How to update passport information in your JFT Prometric ID
If you are planning to work in Japan under the Specified Skilled Worker (SSW) visa, getting your JFT Prometric ID is your very first hurdle. The Japan Foundation Test for Basic Japanese (JFT-Basic) is a requirement for many, and you cannot book this exam without a dedicated ID.
Registering for online portals can sometimes feel like trying to solve a Rubik’s cube blindfolded. Don’t worry, though. Whether you are sitting in a consultancy in Kathmandu or at home, this guide will walk you through the exact process to onto how to update passport information in your JFT Prometric ID without the stress.
Let’s dive into the step-by-step process of creating your account.
11 Steps onto How to Update Passport Information in Your JFT Prometric ID
If you already have a JFT Prometric ID, you might have noticed some recent changes in the registration requirements. To maintain the highest levels of security and exam integrity, it is now mandatory to add your passport information to your existing account.
Failing to update this information can lead to complications when you try to book a seat for the JFT-Basic exam. Whether you’ve recently received a new passport or your old account was created without these details, this blog explores exactly how to update passport information in existing accounts.
How to Update Your JFT Prometric ID Passport Details
Follow these steps carefully to ensure your profile is compliant with the latest Prometric standards.
Step 1: Visit the Official Site
Start by searching for “JFT Basic” on Google or Chrome. Click on the first result, or navigate directly to the JFT-Basic Prometric Official Page
Step 2: Access the FAQ Section
Once you are on the homepage, look at the top right corner of the screen. You will see a link for “FAQ”. Click on it to open the help and support directory.
Step 3: Navigate to ID Registration
On the FAQ page, you will see a sidebar on the right-hand side. Look for the category labeled “ID Registration” and click it. This section handles all queries related to your personal profile and account credentials.
Step 4: The “E-KTP” Link
Scroll through the questions until you find the one that says, “I don’t know how to register E-KTP information.” Even if you are not using an E-KTP (which is specific to certain regions like Indonesia), this is the standard pathway the system uses for updating identity documents like passports.
Step 5: Log In to Your Account
Click on the link within that FAQ answer that says “Confirm and change personal information.” You will be redirected to the login portal. Enter your existing JFT Prometric ID and your password to enter your dashboard.
Step 6: Fill in Passport Details (MRZ Line 1)
Now, look at the bottom of your passport. You will see two lines of text with lots of arrows (<<<<). This is called the Machine Readable Zone (MRZ). For this step, carefully type in the details exactly as they appear on MRZ Line 1. This usually contains your passport type, country code, and your name.
Step 7: Fill in Passport Details (MRZ Line 2)
Next, fill up the details based on MRZ Line 2. This line contains your passport number, date of birth, sex, and the expiration date of your passport. Double-check every single digit! If the name on your JFT Prometric ID does not perfectly match your physical passport, the test center administrators will not let you take the exam.
Step 8: Review Your Information
Before submitting, take a moment to review your information. The system will present a summary of the changes you are about to make.
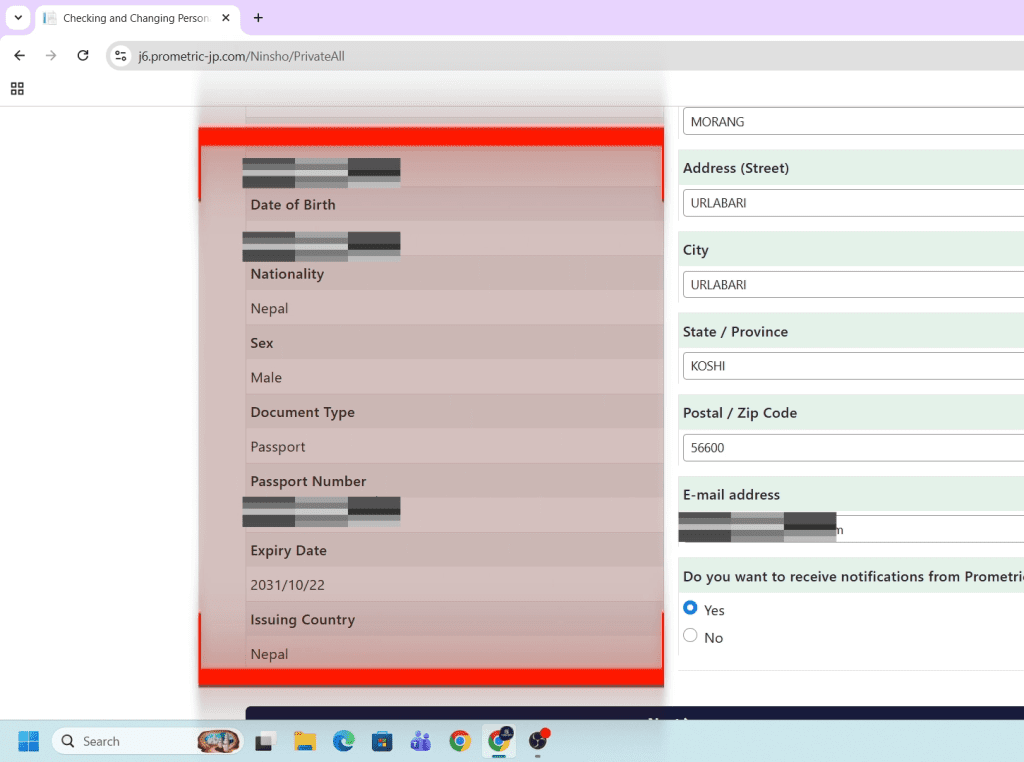
Step 9: Compare the Old Data (Right Box)
The interface is designed to be very clear. In the right-hand box, you will see the detailed information that was used to create your old account. This is your “before” snapshot.
Step 10: Check the New Data (Left Box)
In the left-hand box, the system will display your newly updated passport information. Compare the left and right boxes to ensure your name, date of birth, and passport numbers are correctly updated.
Step 11: Final Confirmation
Once you are satisfied that the left box (new info) is correct, click the Confirm button. Your new passport info will be added to your JFT Prometric ID instantly.
Why Is This Update Now Mandatory?
Prometric has implemented these changes to streamline the check-in process at test centers. By having your passport’s Machine Readable Zone (MRZ) data pre-loaded into your JFT Prometric ID, the staff can verify your identity much faster on exam day.
Important Note: If you are a student or a worker planning to take the test soon, do not wait until the last minute. System updates can sometimes take time to reflect in the booking portal, so it is best to update your passport details as soon as possible.
Conclusion
Updating your profile doesn’t have to be a headache. By following the FAQ pathway and carefully entering your MRZ lines, you ensure that your path to the SSW visa remains clear.
If you found this guide helpful, feel free to share it with your fellow Japanese language learners! For more tips on mastering the N5 level or navigating Japanese administrative portals, check out our [internal guide on JFT-Basic exam day tips]
What to Do After Updating Your ID?
Congratulations! Once you see that email in your inbox, you are officially registered in the Prometric system.
Your next steps should be:
Log back into the portal using your new credentials.